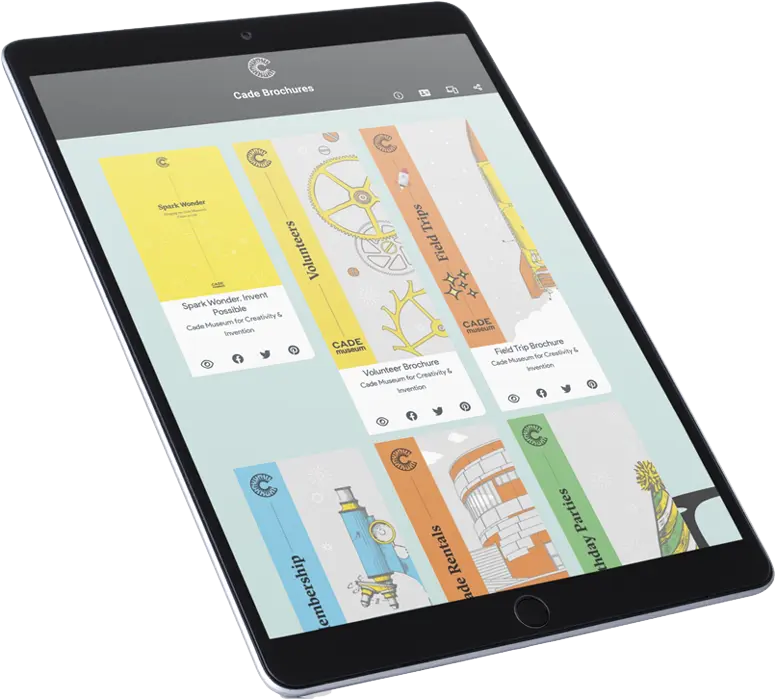


Simplebooklet brings your to life!
brochures
flyers
reports
product sheets
newsletters
invitations
guides
one pagers
bifolds
marketing
branding
communications
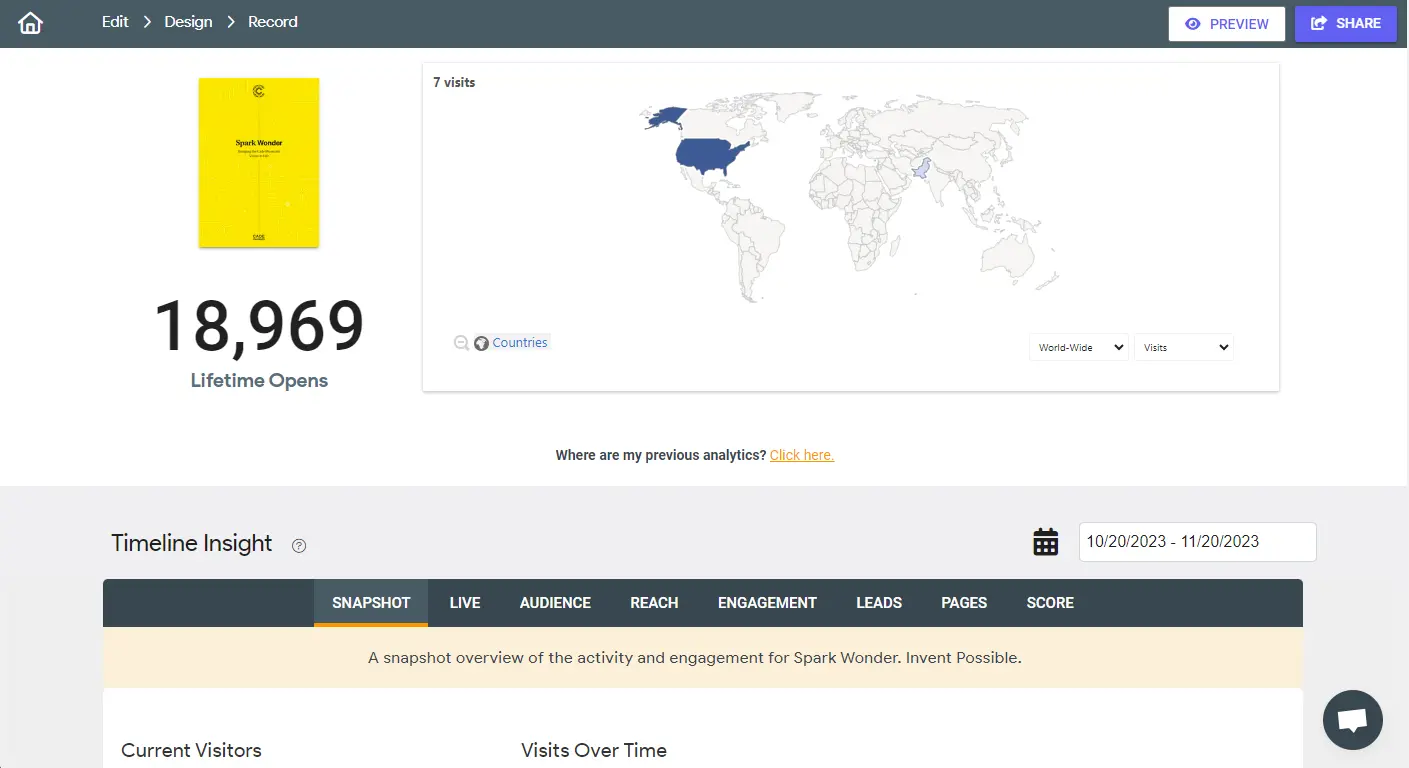
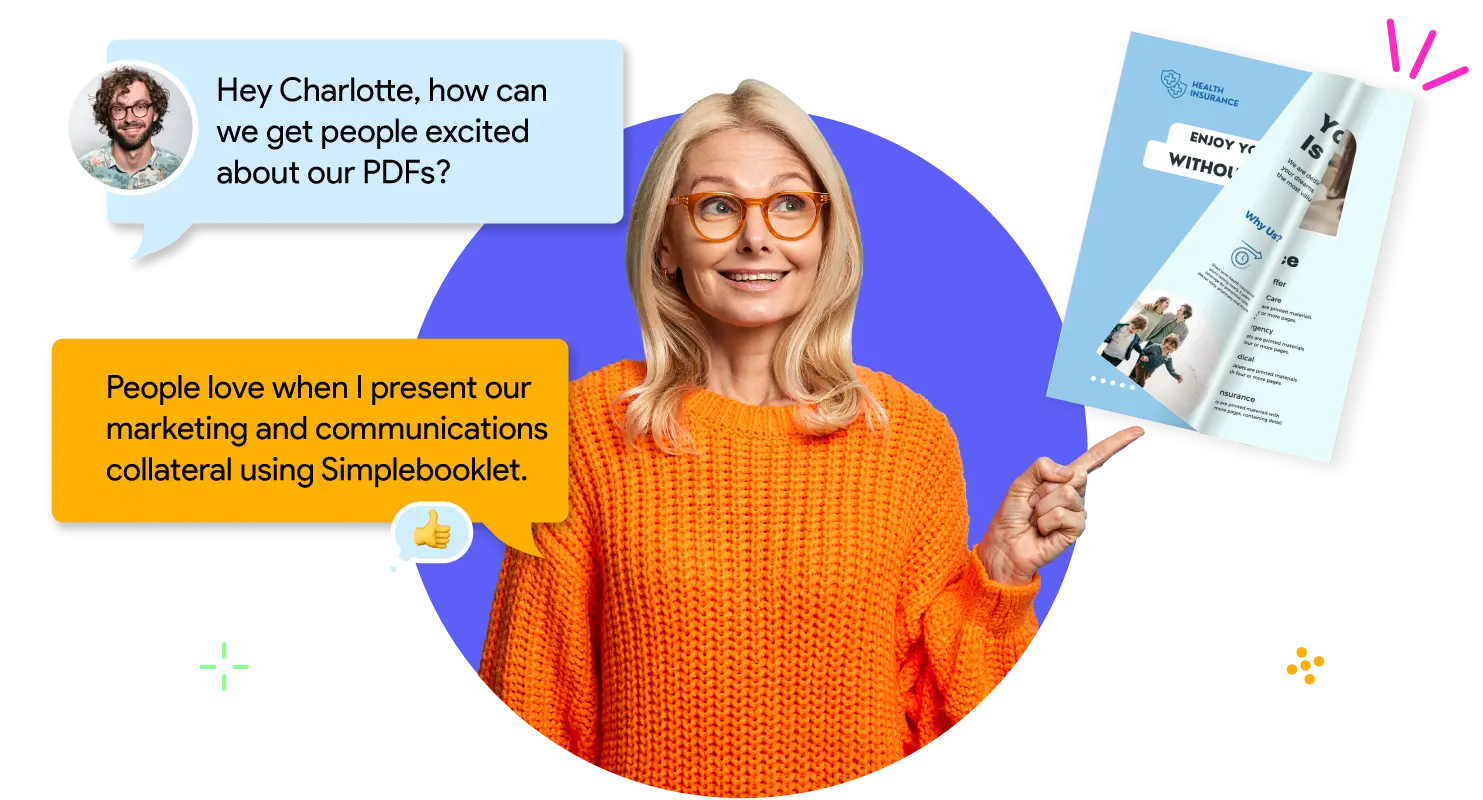
When you share your sales, marketing and communications collateral using Simplebooklet, you build trust in your content, creating the confidence to get clients to connect.
Another 2,713 organizations signed up last week.
Plans start as low as $3.50 a month.