Return to flip book view
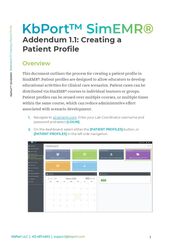
Addendum 1.1: Creating a Patient Profile Overview This document outlines the process for creating a patient profile in SimEMR®. Patient profiles are designed to allow educators to develop educational activities for clinical care scenarios. Patient cases can be distributed via SimEMR® courses to individual learners or groups. Patient profiles can be reused over multiple courses, or multiple times within the same course, which can reduce administrative effort associated with scenario development. 1. Navigate to v2.simemr.com . Enter your Lab Coordinator username and password and select [LOGIN] . 2. On the dashboard, select either the [PATIENT PROFILES] button, or [PATIENT PROFILES] in the left side navigation. 1
3. Click [+CREATE NEW PATIENT PROFILE] in the top right 4. Select [GENERATE BASIC INFORMATION] to fill the fields with basic demographic information. Alternatively, you can manually fill the information to create a custom scenario. 2
5. Once you have entered your desired scenario information, click [CREATE] . 6. Navigate to your newly created patient, and select the cog icon on the patients row. Select [PERMISSIONS] from the dropdown menu. 3
7. Uncheck the Locked box. 8. Click [SAVE] to allow it to be edited. 9. Navigate to your patient, and select the cog icon on the patient's row. Select [EDIT] from the dropdown menu. 10. You will see a Timeline View or you can use the radio buttons to switch to Table View if you choose. Click [+ADD NEW FORM] . TIMELINE VIEW 4
TABLE VIEW AVAILABLE CHARTING OPTIONS Admissions Admission Advance Directives Insurance Consent for Treatment Admission Assessment Provider Documentation Consults History & Physical Progress Notes Provider Orders Nutritional Services Medication Administration Record (MAR) Clinical Data Vitals Intake & Output (I & O) Labs Imaging Radiology EKG & Other Diagnostics Discharge Nurses Notes SOAP Head to Toe Charting by Exception Narrative Notes Pain Assessment ADL Care Plans IPASSBATON ISBAR Surgery Consent for Surgery Consent for Anesthesia Operative Report 5
11. To start, let’s add an Admission form. Under the Admission dropdown, click [ADMISSION] . 12. Here you can select the Admission Date, Department, Isolation Status, Physician Information, additional Patient Information, as well Emergency Contact Information . After entering all desired patient information, click [CREATE] . 6
13. Repeat steps 10 – 12 until you have added the desired number of forms to your patient profile. Congratulations: You have created a patient profile in SimEMR®! You may now navigate to [PATIENT ASSIGNMENTS] to assign your new patient! If needed, refer to pages 14 – 22 of your Quick Start Guide for additional information on assigning patients: https://simplebooklet.com/simemrguide R0231019_01 7