Return to flip book view
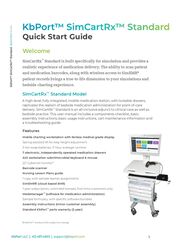
Quick Start Guide Welcome SimCartRx ™ Standard is built specifically for simulation and provides a realistic experience of medication delivery. The ability to scan patient and medication barcodes, along with wireless access to SimEMR® patient records brings a true-to-life dimension to your simulations and bedside charting experience. SimCartRx ™ Standard Model A high-level, fully-integrated, mobile medication station, with lockable drawers, replicates the realism of bedside medication administration for point-of-care delivery. SimCartRx ™ Standard is an all-inclusive adjunct to clinical care as well as bedside practice. This user manual includes a components checklist, basic assembly instructions, basic usage instructions, cart maintenance information and a troubleshooting guide. Features Mobile charting workstation with fanless medical grade display Spring assisted lift for easy height adjustment 3 hot swap batteries, 11-hour average runtime 7 electronic, independently operated medication drawers AIO workstation w/antimicrobial keyboard & mouse 22" Cybernet monitor 1 Barcode scanner Nursing Lesson Plans guide 1 copy with sample learner assignments SimEMR® (cloud-based EMR) 1-year subscription, unlimited licenses, first-time customers only MedsManager ™ (software for medication administration) Sample formulary, with specific software bundles Assembly instructions (minor customer assembly) Standard KbPort ™ parts warranty (2-year) 1: KbPort™ product AIO subject to change 1
Getting Started Components Checklist Each SimCartRx ™ Standard ships on a pallet in 3 boxes. Each pallet contains: ● SimCartRx ™ Standard body and hardware ● SimCartRx ™ Standard battery pack ● AIO 2 workstation w/ antimicrobial keyboard & mouse ● Barcode scanner Add-Ons There are some components which can be purchased separately as an add-on to SimCartRx ™ Standard. These include: ● Wireless scanner ● Zebra printer ● 10020397 labels ● Zebra A/C adapter ● Glove box holders ● Metrex sani-cloth cradle ● 5 QT Kendall sharps container 2. Typically Cybernet 22" monitor. 2
Labeled Diagram Of Physical Features 1. Adjustable LCD mount 2. Laptop compartment 3. Rear handle 4. Storage basket 5. Work surface with front handle 6. Lift brake release Release brake to raise and lower cart 7. Cable management housing 8. Sliding keyboard tray, mouse holder, mouse tray (accommodates both right and left handed users) 9. Casters, 2 rear non-locking & 2 front-locking 10. Latch 11. Key and lock hole, single key provided 3
Assembling Simcartrx ™ Standard Thank you for choosing SimCartRx ™ Standard. You must complete all steps in this section before your SimCartRx ™ device can be used. If you experience any difficulties setting up your SimCartRx ™ Standard, please contact us at support@kbport.com or 412.487.4663. 1. Install Hardware Each SimCartRx ™ Standard comes partially assembled. You will need to complete the assembly for your cart and attach the cart computer to your SimCartRx ™ using the assembly instructions included in the MedCase drawer. 2. Install Battery Install the cart battery using the instructions included in the MedCase drawer. The battery needs to be charged for 24 hours before first use. 3. Establish Network Connection Please consult your IT staff to establish an internet connection for your SimCartRx ™ Standard device. 4. Charge SimCartRx ™ Standard Battery Before software setup and configuration required for cart use can be completed, your cart battery must be charged for 24 hours. 5. Activate SimCartRx ™ Standard Please contact us at support@kbport.com or call us at 412.487.4663 to activate your SimCartRx ™ Standard. 6. Install and Configure SimCartRx ™ Standard Software Before your cart can be used for medication dispensation, installation and configuration of SimCartRx ™ Standard software (unique to your specific software bundle) must be completed. 4
SimCartRx ™ Standard Adjustments Adjusting SimCartRx ™ Standard Height To prevent cart damage & for the safety of the user, DO NOT adjust the lift mechanism with an empty cart. It may cause the work surface to rise or fall rapidly. Adjusting Monitor Height Use the 3mm Allen key to adjust the height of the monitor to desired position. 5
1. Remove the plastic universal joint cover 2. Find the nylon nut (not the screw head) and use wrench to adjust tension of the universal joint a. Clockwise: more tension b. Counterclockwise: less tension 3. When the desired tension is achieved, replace the plastic cove r 6
SimCartRx ™ Standard Activation Medication Dispensing Solutions by KbPort ™ include soware bundles to control the cart or cabinet hardware. Soware bundles include: SimEMR ® with MedsManager ™ and MedSkills ™ (local or Enterprise) with MedsManager ™ . Please consult the documentation for your institutionʼs soware bundle for specific information pertaining to using your device for medication dispensing or medication administration. Warnings SimCartRx ™ Standard Top Removal and Latch If access to the work surface compartment is desired, the latch on the left rear must be disengaged. The top can be returned to the original position by gently closing the top downward. Ensure the latch is re-engaged to secure the top. Handle The cart handle risks breakage with > 5kg (11 lbs) weight applied. 7
Monitor Assure the monitor is installed properly before adjusting cart/work surface height. Casters Press the casters locks down to lock them in place. Cart Height The height adjustment button is located on the right side of the cart under the top, enclosed by a clear protector. Open the protector and depress the button while moving the work surface to the desired position. See page 5. 8
When raising/lowering the work surface, position hands on both sides of the cart top (see figure). To prevent damage, do not press on the center of the work surface or keyboard area. Once the cart is positioned to desired height, secure the height adjuster protector to the closed position to prevent unintended movement. 9
Cart Travel When the cart needs to be moved over uneven surfaces, lift the cart from under the keyboard compartment (as shown). To prevent cart damage, do not lift from the front or rear handles. Maintenance All cart maintenance must be performed at least once per month by a professional technician. Cleaning 1. Before any maintenance, ensure the cart is unplugged from the main power source and turned off. 2. Use only a damp cloth to remove superficial dirt and cleansers if used when necessary. 3. No fluids should be placed into or on the cart surface to protect from electrical hazard. Position cart out of moist environments as well. 4. Do not use any abrasive cleansers or sponges when cleaning cart surfaces to protect the finish. 5. Test cleaner of choice on a small location to prevent finish damage, prior to whole surface use. 10
6. Ensure the cart is completely dry before powering on at the wall outlet. Cleaning Recommendations It is strongly recommended that non-abrasive or diluted products should be used to clean plastic components. (I.e. soap/water, diluted alcohol). Sani-wipes are permitted to assist with infection control. 1. Pen or Marker spots on the work surface can be cleaned with a soft cloth and 70-91% isopropyl alcohol. Expeditious cleaning is recommended to prevent staining. 2. Iodine stains can be removed if present by above methods. Expeditious cleaning is recommended to prevent staining. 11
Inspections Cart inspections must be performed monthly. If faults or damage are noted, immediately discontinue use of the cart and contact your distributor for further assistance. Casters The maximum weight of the cart is 40kg. To allow cart functionality and movement as intended, inspect the casters monthly for debris and remove it promptly. Position the cart away from flooring hazards that could impact the caster mechanisms. Connections Any screw or fastener connections becoming loose should not be overly tightened. This may damage not only the connector, but also the components. Keypad Usage The keypad on the front of the cart can be used to open drawers. Opening a Standard Drawer 1. Before any code entry, press the * button twice to clear the keypad. This will prevent past errors from affecting new attempts. 2. Press 123456#. 3. Press the number of a drawer. The drawers start at 1 in the top left, working left to right then top to bottom. 4. Press #. The drawer should now open. Opening the Storage Drawer 1. Before any code entry, press the * button twice to clear the keypad. This will prevent past errors from affecting new attempts. 2. Press 123456#88#1256#. 3. Press #. The drawer should now open. 12
Common Error Messages Described in the following chart are common error messages, a brief description of the potential causes for each, and proposed solutions. SYMPTOMS RESOLUTION Cart is difficult to move Ensure the two front locking casters are not locked. Inspect if there is any debris sticking to the casters. It is difficult to adjust the cart height When the lift mechanism is unable to lift or descend, ensure that the lift brake is completely pressed. Then, lift the work surface up slowly to prevent sudden rise in height of the work surface. No drawers will open/not connected popup Verify that the cart USB cable is connected and restart the cart. If this doesn't fix the problem, factory settings were not set correctly. Contact KbPort ™ . Invalid credentials This error message appears when a login attempt fails. There are 3 reasons this can occur, and they should be checked in the order listed: 1. The user entered an invalid password: If the user forgot their password, they should have it reset by their lab coordinator on v2.simemr.com. 2. The user is currently locked out of their account: If the user is locked out of their account on v2.simemr.com, they must reset their password before they are able to access MedsManager ™ . 3. The user is not in a current subscription: If the user is not in a valid subscription, they will need to talk to the SimEMR ® Team to either start a subscription or be migrated into a current subscription. 13
Closing Remarks If a problem presents that cannot be corrected by following the steps included in this guide, please contact KbPort ™ for technical support. To aid in the resolution process, please be sure to include the error logs referenced above. SimCartRx ™ Standard is designed for use with KbPort ™ Medication Dispensing Solution soware bundles. Please consult the Quick Start Guide(s) for your specific soware bundle to learn how to use SimCartRx ™ Standard for medication administration. Available Quick Start Guide combinations include: MedsManager ™ Quick Start Guide + SimEMR® Quick Start Guide MedsManager ™ Quick Start Guide + MedSkills ™ (local or Enterprise) Quick Start Guide Our support staff and education consultants are more than happy to help fill in the details of specific features, support the education of how to accomplish desired workflows, and assist in any technical questions you may have. Thank you, KbPort ™ Simplicity ™ Team R0240124_01 14