Return to flip book view
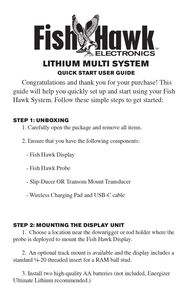
Message Congratulations and thank you for your purchase! This guide will help you quickly set up and start using your Fish Hawk System. Follow these simple steps to get started:STEP 1: UNBOXING1. Carefully open the package and remove all items.2. Ensure that you have the following components: - Fish Hawk Display - Fish Hawk Probe - Slip-Ducer OR Transom Mount Transducer - Wireless Charging Pad and USB-C cable STEP 2: MOUNTING THE DISPLAY UNIT1. Choose a location near the downrigger or rod holder where the probe is deployed to mount the Fish Hawk Display.2. An optional track mount is available and the display includes a standard ¼-20 threaded insert for a RAM ball stud. 3. Install two high-quality AA batteries (not included, Energizer Ultimate Lithium recommended.)LITHIUM MULTI SYSTEMQUICK START USER GUIDESTEP 5: USING THE FISH HAWK SYSTEM1. Press the power button on the Fish Hawk Display Unit to power it on. Press the up arrow to illuminate the backlight for use in low-light conditions.2. Attach the Probe and weight and lower into the water. The Probe is water-activated and will turn on automatically.3. The Fish Hawk Display Unit will show speed and water temperature at the ball.4. Factory default display settings are recommended. 5. Utilize the data provided by the Fish Hawk System to optimize your shing strate-gy. Locate the ideal water temperature zones and repeat productive trolling speeds.STEP 6: MAINTENANCE AND CARE1. Regularly inspect all cables and connections for wear or damage.2. Rinse the Transducer and Probe with fresh water after each use to prevent corrosion from saltwater.3. Store your Fish Hawk Probe securely in a dry place when not in use.For more information and troubleshooting, please visit our website at shhawkelectronics.comWeight
STEP 3A: ATTACHING THE SLIP-DUCER1. Attach the Slip-Ducer to the line or downrigger cable. 2. The Slip-Ducer must remain at least 12” underwater while troll-ing.3. Connect the Slip-Ducer Cable to the back of the Fish Hawk Display.STEP 3B: INSTALLING THE TRANSOM MOUNT TRANSDUCER1. Locate a spot on the transom of your boat to attach the transduc-er away from any propellers or other obstructions. See Recommended Transducer Locations diagram below.2. Attach the Transducer to the boat’s hull using hand tools. Install ush with the bottom of the hull, parallel to the surface of the water. 3. Connect the Transducer Cable to the back of the Fish Hawk Display.STEP 4: CHARGE THE PROBE 1. Charge Probe prior to use. Expect more than 50 hours of use per charge.2. Stand the Probe on its rear centered over the Fish Hawk logo on the charging pad.A blue ring around the charging pad will fully illuminate indicating the probe is properly located, a ashing blue ring indicates improper location.A red light will illuminate inside the probe while charging. The light will turn off when fully charged. A full charge requires 2-4 hours, a partial charge can be obtained in 20 minutes.NOTE: the probe will feel warm to the touch after charging.Twist the stopper to open the slot in the Slip-Ducer™Place the line in the slot and twist the stopper 180° to close, securing the Slip-Ducer™ on the line.
STEP 3A: ATTACHING THE SLIP-DUCER1. Attach the Slip-Ducer to the line or downrigger cable. 2. The Slip-Ducer must remain at least 12” underwater while troll-ing.3. Connect the Slip-Ducer Cable to the back of the Fish Hawk Display.STEP 3B: INSTALLING THE TRANSOM MOUNT TRANSDUCER1. Locate a spot on the transom of your boat to attach the transduc-er away from any propellers or other obstructions. See Recommended Transducer Locations diagram below.2. Attach the Transducer to the boat’s hull using hand tools. Install ush with the bottom of the hull, parallel to the surface of the water. 3. Connect the Transducer Cable to the back of the Fish Hawk Display.STEP 4: CHARGE THE PROBE 1. Charge Probe prior to use. Expect more than 50 hours of use per charge.2. Stand the Probe on its rear centered over the Fish Hawk logo on the charging pad.A blue ring around the charging pad will fully illuminate indicating the probe is properly located, a ashing blue ring indicates improper location.A red light will illuminate inside the probe while charging. The light will turn off when fully charged. A full charge requires 2-4 hours, a partial charge can be obtained in 20 minutes.NOTE: the probe will feel warm to the touch after charging.Twist the stopper to open the slot in the Slip-Ducer™Place the line in the slot and twist the stopper 180° to close, securing the Slip-Ducer™ on the line.
Congratulations and thank you for your purchase! This guide will help you quickly set up and start using your Fish Hawk System. Follow these simple steps to get started:STEP 1: UNBOXING1. Carefully open the package and remove all items.2. Ensure that you have the following components: - Fish Hawk Display - Fish Hawk Probe - Slip-Ducer OR Transom Mount Transducer - Wireless Charging Pad and USB-C cable STEP 2: MOUNTING THE DISPLAY UNIT1. Choose a location near the downrigger or rod holder where the probe is deployed to mount the Fish Hawk Display.2. An optional track mount is available and the display includes a standard ¼-20 threaded insert for a RAM ball stud. 3. Install two high-quality AA batteries (not included, Energizer Ultimate Lithium recommended.)LITHIUM MULTI SYSTEMQUICK START USER GUIDESTEP 5: USING THE FISH HAWK SYSTEM1. Press the power button on the Fish Hawk Display Unit to power it on. Press the up arrow to illuminate the backlight for use in low-light conditions.2. Attach the Probe and weight and lower into the water. The Probe is water-activated and will turn on automatically.3. The Fish Hawk Display Unit will show speed and water temperature at the ball.4. Factory default display settings are recommended. 5. Utilize the data provided by the Fish Hawk System to optimize your shing strate-gy. Locate the ideal water temperature zones and repeat productive trolling speeds.STEP 6: MAINTENANCE AND CARE1. Regularly inspect all cables and connections for wear or damage.2. Rinse the Transducer and Probe with fresh water after each use to prevent corrosion from saltwater.3. Store your Fish Hawk Probe securely in a dry place when not in use.For more information and troubleshooting, please visit our website at shhawkelectronics.comWeight