Return to flip book view
Message
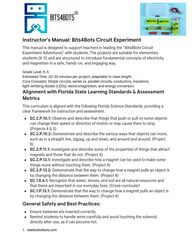
Instructor's Manual: Bits4Bots Circuit ExperimentThis manual is designed to support teachers in leading the "Bits4Bots CircuitExperiment Adventures" with students. The projects are suitable for elementarystudents (K-5) and are structured to introduce fundamental concepts of electricityand magnetism in a safe, hands-on, and engaging way.Grade Level: K-5Estimated Time: 20-30 minutes per project, adaptable to class length.Core Concepts: Simple circuits, series vs. parallel circuits, conductors, insulators,light-emiing diodes (LEDs), electromagnetism, and energy conversion.Alignment with Florida State Learning Standards & AssessmentMetricsThis curriculum is aligned with the following Florida Science Standards, providing aclear framework for instruction and assessment.● SC.2.P.10.1: Observe and describe that things that push or pull on some objects can change their speed or direction of motion or may cause them to stop.(Projects 4 & 5)● SC.2.P.10.2: Demonstrate and describe the various ways that objects can move, such as in a straight line, zigzag, up and down, and around and around. (Project5)● SC.2.P.11.1: Investigate and describe some of the properties of things that aract magnets and those that do not. (Project 4)● SC.2.P.13.1: Investigate and describe how a magnet can be used to make some things move without touching them. (Project 4)● SC.2.P.13.2: Demonstrate that the way to change how a magnet pulls an object is by changing the distance between them. (Project 4)● SC.1.E.6.1: Recognize that water, stones, and soil are all natural resources and that these are important in our everyday lives. (Cross-curricular)● SC.1.P.13.1: Demonstrate that the way to change how a magnet pulls an object is by changing the distance between them. (Project 4)General Safety and Best Practices:● Ensure baeries are inserted correctly. ● Remind students to handle wires carefully and avoid touching the solenoid directly aer use, as it can become hot.1 www.bits4bots.com
● Encourage teamwork and discussion throughout the projects. ● Ask open-ended questions to foster curiosity and critical thinking. Project 1: Light Up a Lightbulb! This project introduces the most fundamental concept of electricity: a complete circuit. Learning Objectives: ● Students will be able to describe how electricity ows through a circuit to create light. ● Students will identify the components of a simple circuit and their functions. ● Students will understand that electricity requires a complete, unbroken path to ow. Assessment Metrics: ● Students can successfully build a simple circuit that illuminates the lightbulb. ● Students can correctly name the function of each component (baery, wire, lightbulb) when prompted. ● Students can explain why the circuit must be a complete loop for the lightbulb to light up. Key Vocabulary: ● Circuit: A complete path that electricity can follow. ● Electricity: A form of energy that can make things work. ● Baery: Provides the power for the circuit. ● Lightbulb: An object that turns electrical energy into light. ● Wire: A conductor that allows electricity to travel. Materials: ● Baery holder and AA baery ● Lightbulb and its holder ● Wires Discussion Questions: ● Before: "What do you think will happen when we connect the baery to the lightbulb?" ● During: "Is the lightbulb lit? Why do you think it needs a complete loop to work?" 2
● Aer: "Can you draw a picture of the path the electricity took? What happens if you take one wire o?" Project 2: Series and Parallel Circuits This experiment builds on the basic circuit concept by introducing two common circuit congurations. Learning Objectives: ● Students will be able to identify and build both a series and a parallel circuit. ● Students will observe and describe how the brightness of the lightbulbs changes based on the circuit type. ● Students will understand that a complete path is necessary for each component to work in a parallel circuit. Assessment Metrics: ● Students can build both a series and a parallel circuit and describe how they are dierent. ● Students can explain the change in brightness they observe in the bulbs. ● Students can predict what will happen if a bulb is removed from each type of circuit. Key Vocabulary: ● Series Circuit: A circuit where components are connected in a single line. ● Parallel Circuit: A circuit where electricity can take multiple paths. Materials: ● Baery holder and AA baery ● Two lightbulbs and their holders ● Wires Discussion Questions: ● Before: "What do you think will happen if we add a second lightbulb? Will they both be as bright as the rst one?" ● During: "In the series circuit, what happens if you unscrew one of the lightbulbs? Why do you think that happened?" (Answer: It breaks the circuit for both bulbs). "In the parallel circuit, what happens when you unscrew one? Why is it dierent?" (Answer: The other bulb stays lit because it has a complete path). 3
● Aer: "When would you want to use a series circuit? When would a parallel circuit be beer?" (Hint: Think about holiday lights!). Project 3: Make a Trac Light This project introduces LEDs, the breadboard, and the importance of polarity (connecting components the right way). Learning Objectives: ● Students will learn what an LED is and how it works. ● Students will understand the concept of polarity and why LEDs must be connected in a specic orientation. ● Students will connect a simple circuit on a breadboard. Assessment Metrics: ● Students can successfully connect the LED to light it up and explain why it must be connected in a specic way. ● Students can use the switch to turn the LED on and o and explain its function in the circuit. ● Students can draw a diagram of their LED circuit showing the correct polarity. Key Vocabulary: ● LED: A special light that only allows electricity to ow in one direction. ● Polarity: The positive (+) and negative (-) sides of a baery and components. Materials: ● Baery holder and AA baery ● LEDs ● Wires Discussion Questions: ● Before: "Have you seen an LED before? Where?" (Hint: Trac lights, remote controls, etc.) "What do you think the long leg on the LED means?" ● During: "What happens if you turn the LED around? Why do you think it doesn't light up?" (Answer: The LED only works when electricity ows from the long leg to the short leg). ● Aer: "How are trac lights similar to our circuit? Why do trac lights use three dierent colors?" 4
Project 4: Build an Electromagnet This activity demonstrates the relationship between electricity and magnetism. Learning Objectives: ● Students will learn that electricity can create a magnetic eld (SC.2.P.13.1). ● Students will build a temporary magnet and observe how it can push or pull objects (SC.2.P.10.1). ● Students will demonstrate that the magnetic force changes with distance (SC.2.P.13.2). Assessment Metrics: ● Students can successfully create an electromagnet that picks up a small metal object. ● Students can describe the relationship between the electricity and the magnet they created. ● Students can explain why the magnetic force disappears when the circuit is broken. Key Vocabulary: ● Electromagnet: A temporary magnet created by an electric current. ● Magnetism: The force of araction or repulsion between objects. ● Solenoid: A coil of wire that becomes a magnet when an electric current passes through it. Materials: ● Baery holder and AA baery ● Solenoid module or a nail/screw and wire ● A metal object (like a paperclip or wrench) Teacher's Note: ● The solenoid will get warm. Supervise students and remind them not to touch it for too long. Discussion Questions: ● Before: "What do you know about magnets?" "Do you think we can make our own magnet using the baery?" ● During: "What happens when you disconnect the wire from the baery? Why 5
does the metal object fall o?" (Answer: The electromagnet only works when electricity is owing). ● Aer: "Where do you think electromagnets are used in the real world?" (Hint: Junkyard cranes, doorbells, speakers). Project 5: The Wind-Powered Car This project explores the concept of energy conversion, specically electrical to mechanical. Learning Objectives: ● Students will observe how a DC motor converts electrical energy into motion (SC.2.P.10.1). ● Students will understand how to change the direction of motion by reversing polarity. ● Students will describe how the car moves in dierent directions (SC.2.P.10.2). Assessment Metrics: ● Students can assemble the wind-powered car and observe it move. ● Students can explain that the motor converts electrical energy into motion. ● Students can predict and demonstrate how to change the car's direction by swapping the wires. Key Vocabulary: ● DC Motor: An electrical machine that converts electricity into motion. ● Energy Conversion: Changing one form of energy into another (e.g., electrical to mechanical). Materials: ● Toy car chassis with a DC motor ● Fan blade ● Baery holder and AA baery 6