Return to flip book view
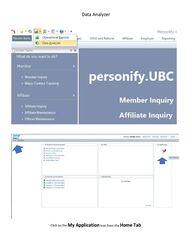
Data Analyzer Click on the My Application Icon from the Home Tab
Go to New to create a new query You need to choose a Data Source – Always use Universe You need to choose a Universe – Always use UBC MEMBER
Click and expand the member folder Now you can start to build your Query
Click on the field you would like to show in your report and drag into the Results Objects You must also choose your Query Filters. You must have the following filters to pull current members. (This is just an example of information you can pull). Is Active Flag Y Is Member Flag Y Number of Arrears Months List the months in arrears (you can change the way you pull the data by selecting an option, for instance Between 2 -5) Affiliate ID UBC00372 (sample – if you have more than one local access you must type the local you are needing. If needing multiple locals use UBC00372;UBC00351;UBC00744 ) When all the fields are selected, you click on Run Query Your report will look like this
You can change the Report Header by clicking on it You can sort a column by clicking on the column title, right click and go to Sort If you forgot to add a column and need to edit the report, click on Edit Data Provider
Find the field you need to add. Click and drag it to your Result Objects. Run query again. The new column will not show. You must drag it from the Available Objects into your report. Make sure you line it up directly between the columns where you want it.
Now you want to Save it. Click on Save AS You will want to save the file in your Favorites Folder. Name your file and save.
Scheduling a query to be emailed Click on the Documents tab. You will see all your saved queries. Right click on your file (Admin Retreat) and click on Schedule Go to the Recurrence tab. This is where you schedule when and what time your emails will be sent. The time zone is Pacific.
Formats - Now you pick your format for your file. I always pick Excel so you can manipulate the data any way you need. Destination Email – Fill in the requested information. The Add Attachment should be checked. Once everything looks correct, click on schedule located on the bottom right of this screen.
Download file You can download a file by selecting Export You can select to download either a PDF or into Excel
Click on the download file and it will open in Excel