Return to flip book view
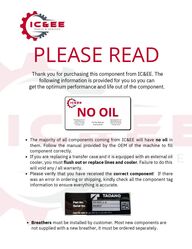
Message NO OILFill Per ManualInstructionsICEE Equipment LLC4300 Little YorkHouston, TX 77093(713) 926-1100ICEE Equipment LLC38009 Butcher Rd.Leetonia, OH 44431(713) 926-1100 PLEASE READ Thank you for purchasing this component from IC&EE. Thefollowing information is provided for you so you can get the optimum performance and life out of the component. Breathers must be installed by customer. Most new components arenot supplied with a new breather, it must be ordered separately. The majority of all components coming from IC&EE will have no oil inthem. Follow the manual provided by the OEM of the machine to fillcomponent correctly. If you are replacing a transfer case and it is equipped with an external oilcooler, you must flush out or replace lines and cooler. Failure to do thiswill void any / all warranty. Please verify that you have received the correct component! If therewas an error in ordering or shipping, kindly check all the component taginformation to ensure everything is accurate.
Service Revised 29/09/20122.1© Kessler & Co. GmbH & Co.KGAll rights reserved Page 1 of 1 SectionLubrication intervals and maintenance instructionsGeneral lubrication instructionsFill levelsOil changeBefore putting the axle into operationPreservation of Kessler axles for an extended storage periodAre checked at the level control plugs.Replace the breather with a screw plug with a sealant in order to avoid water intrusion and oil leakage.Fill axles completely up with oil, the same applies to wet disc brakes.Protect machined surfaces (for example: rim surface, steering cylinder, brake disc, ….) with additional anticorrosive. Drain storage oil. Fill the axle with suitable oil (see service manual Kessler & Co. GmbH & Co.KG) to therequired oil level. Check sealing contact surfaces for corrosion. Check the seals immediately after start-up for leakage and renew them if leaking. Completely remove the anticorrosive machined surfaces (for example: rim surface, steering cylinder, brake disc, ….). The rim face must be cleaned from rust or grease in order to secure a correct friction tight with the rim and to prevent loosening of the rim.Check axle structure for corrosion, especially after several years of storage.Place the vehicle in a horizontal position.Draining of the oil is to be accomplished only in warm condition. Clean all lubrication pointsbefore, opening them. Open the drain holes on the carrier assembly, on the wheel assemblies,and if present, on the interaxle differential and drop gear housing. On the hub assemblies, thedrain plug should be turned downward.Oil drainingReplacement of the oil draining plugsRemove the oil filler plug as well as the oil level control plug on the carrier assembly, on thewheel assembly, and, if present, on the interaxle differential and drop gear housing. (See page 3lubrication points).Oil fillingCheck the oil level at the oil level plug hole (Overflow control).a. Wait a few minutes.b. If the oil level falls, c. add oil until the level remains constant.Clean the grease nipples before lubrication.1.2.3.4.5.6.7.8.
ServiceRevised 29/09/20122.2.1© Kessler & Co. GmbH & Co.KGAll rightsreservedPage1of 1SectionLubrication intervals and maintenance instructions Drop gearD51 / D108Single drive assemblyDrive assembly with throughdriveCardan shaft intermediate bearingThe binding lubrication points have to be taken from the according installation drawing of the axleI = Oil fill plugII = Oil level control plugIII = Oil drain plugIV = Grease nipple*The position is dependent from therespective axle version. *II – only at version with separately oilspace. *Version with interaxle differential.Fill 1,5 literoil at *Ifor first -time filling andfor refilling! Lubrication points
ServiceRevised 29/09/20122.2.2© Kessler & Co. GmbH & Co.KGAll rights reservedPage1of 1SectionLubrication intervals and maintenance instructions Tumbler bearingHub assembly with wet disc brakeLubrication points at universal jointand brake shaft.(If not maintenance – free)Hub assembly with planetary gear driveThe binding lubrication points have to be taken from the according installation drawing of the axleI = Oil fill plugII = Oil level control plugIII = Oil drain plugIV = Grease nippleLubrication points
ServiceRevised 29/09/20122.3© Kessler & Co. GmbH & Co.KGAll rights reservedPage1of 2SectionLubrication intervals and maintenance instructions Lubricants and lubrication intervalsLubrication pointLubricant Remarks Lubrication intervals pinion bearingBrake shaft bearingBrake shoe bearingWheel bearingWet disc brakeDrive assemblyWheel hub plane- tary gear driveInteraxledifferentialDrop gear/Gear boxesWheel bearing oil lubricatedMulti disk parking brakeCardan shaft inter-mediate bearingSteering knuckle bearingSteering knuckle bearingUniversal jointTrack rodHydraulicoilISO VG 32Fuchs RenolitLX-NHU 2see chapter -7- Multi – use greaselithium saponifiedgroove penetrationper NLGI 2f. e. FuchsRenolit MP 150OilchangeOilchangewet runningif provided formaintenance reducedif provided forif provided forif provided forif greaselubricatedAttention! 2.)Attention! 2.)if grease lubricatedoilchangeCheck oil level atcontrol pointsmonthlyLightly greased at brakeshoe new assemblyChange grease at wheel hub disassembly1.)at leastafter100Bh1000Kmevery500Bh5000Kmevery1000Bh10000Kmat least1x peryear1x in 2 yearsSteering cylinder-ball head/-spherical plain bearing(Bh = Hours of operation)dependent on tank volume / coolingsystem / operation conditionsnot external cooled Hypoid – gear oil perMIL-L – 2105 B / API GL 5Hypoid – gear oil in multi –range characteristic perMIL-L – 2105 C / D / API GL 5 SAE 90 or multi grade oils for normal external temperature SAE 75 W – 90; SAE 75 W – 85 for external temperature lower – 10°C SAE 140 or multi grade oils for external temperature over + 30°C external cooledoilchangeat least
ServiceRevised 29/09/20122.3© Kessler & Co. GmbH & Co.KGAll rights reservedPage2of 2SectionLubrication intervals and maintenance instructions 1.) Whichever occurs first.2.) The bearing point is to be lightly lubricated only, to avoid the penetration of grease in the interior of the brake (use only hand operated grease gun and remove surplus grease!). Check regularly the brake shafts and if need correct the lubrication intervals (danger of overheating!) On the axles with self locking differentials, a noise is produced if normal oils are used.In case of abnormal noises and in case of a jerky roll off of the tyres, use gear oil EP withadditives of the “Limited Slip” type conforming to specification M 2C -104 A.Important –if a noise is produced on axles with self locking differentials
ServiceRevised 23/11/20162.3.1© Kessler & Co. GmbH & Co.KGAll rights reservedPage 1of1SectionLubrication intervals and maintenance instructions Recommendable hypoid gear oilscorrespondingMIL-L 2105 B/API GL 5MIL-L 2105 C/D/API GL 5resp. MOBIL - HD 90 - A ARAL - Getriebeöl Hyp 90ESSO - Getriebeöl GX - D 90FUCHS - Renogear Hypoid 90SHELL - Spirax MB 90 / HD 90AVIA - Getriebeöl Hypoid 90 EPAGIP - Rotra MP / Rotra MP DBFINA - Pontonic MP SAE 85 W - 90ADDINOL – Getriebeöl GH 85 W 90 BP- Mehrzweck - Getriebeöl EP SAE 90TEXACO - Multigear EP SAE 85 W / 90 ELF - Tranself Typ B 90 / Tranself Typ B 80 W - 90On no account use “normal” gear oils!
ServiceRevised 01/10/20122.4© Kessler & Co. GmbH & Co.KGAll rights reservedPage1of 1SectionLubrication intervals and maintenance instructions General maintenance instructionsCheck - and main- tenance pointsRemarks Maintenance intervalsWheel bearingWheel nutsCastle nuts/track rodScrews/drive flangeNuts/axle mounting boltsBrakes (see also chapter 7)Wet disc brakeWet disc brake -spring load designSteering -and trackrod leverBolted connections(for example drive assembly) Ring gear support bolton drive assemblySealsDifferential lockInspect, if necessary readjust wheel bearingCheck and tighten with a torque wrench (after tire change after 50km and 200km)Check and retighten(Verify the adjustment)Check lining wear, if necessary readjust, control the proper operation of the brake shaftsCheck lining wearCheck lining wearCheck and retighten mounting bolts )Check from time to timeReadjust (if necessary)Check from time to timeCheck function and the auto-matic return in original positionmonthlymonthlymonthly1.)after50Bh500Kmafter100Bh1000Kmevery500Bh5000Kmevery1000Bh10000Kmat least1x peryear*) If the bolts are moving (Loctite brakes loose), the lever has to be mounted once more.1.) Whichever occurs first.(Bh = Hours of operation)
ServiceRevised 01/10/20123.3© Kessler & Co. GmbH & Co.KGAll rights reservedPage1 of 2 KapitelGeneral instructions for correctassembly and disassemblyTightening torquesGeneral instructions for tightening torques (Nm)Tightening torque of metric coarse-pitchthread= 0,14All tightening torques are rated in Nm. Tolerance of the tightening torques is ±5%(assuming a manually operated torque spanner is used)Thread8.8 8 10.9 10 12.9 12Screw Nut Screw Nut Screw NutM 4M 5M 6M 8M 10M 12M 14M 16M 18M 20M 22M 24M 27M 303,05,910254985135210300425580730110014504,48,71536721252003104306108301050155021005,110184384145235365500710970122018002450
ServiceRevised 01/10/20123.3© Kessler & Co. GmbH & Co.KGAll rights reservedPage2 of 2 KapitelGeneral instructions for correctassembly and disassemblyTightening torque ofmetric fine pitchthreadTightening torque of thenut for steering stopThigtening torque for galvanized bolts and nuts!Approximate valuefor the thigthening torque for screw plugTightening torque for brake caliper dowel screws (greased !)ThreadThread8.8 8Tightening torque(Approximate value)10.9 10 12.9 12Tightening torque(Screw plugs with O-Ring)45Screw Nut Screw Nut Screw NutM 20 x 1,5M 27 x 2M 8 x 1M 10 x 1M 10 x 1,25M 12 x 1,25M 12 x 1,5M 14 x 1,5M 16 x 1,5M 18 x 1,5M 20 x 1,5M 22 x 1,52755529389145225340475650300398176135130215330485680920400+100900+ 1004695901601552553905707901050M14x1,5M16x1,5M22x1,5M24x1,5M30x1,5M42x1,5M45x1,5ca. 45ca. 60ca. 100ca. 120ca. 160ca. 260ca. 280- 100---- Regard reduced thightening torque for galvanized bolts and nuts!
ServiceRevised 01/10/20123.3.1© Kessler & Co. GmbH & Co.KGAll rights reservedPage1 of 1 KapitelGeneral instructions for correctassembly and disassemblyUnitsComparison table for unitsNames of the legal units25,40 mm 1 mm 1 kg (kilogram) 9.81.Nm (1 kpm) 1,356 Nm (0,138 kpm) 1 bar (1,02kp/cm2) 0,070 bar (0,071 kp/cm2) 1 Litre 4,456 Litre 1 Litre 3,785 Litre 1609,344 m 0°C (Celsius) 1°C (Celsius) 0°C (Celsius) 1°C (Celsius)================ 1 in (inch) 0,0394 in (inch) 2,205 lb (pounds) 7,233 lbf x ft (pound force foot) 1 lbf x ft (pound force foot) 14,5 psi (pound force per square inch lbf/in2) 1 psi (lbf/in2) 0,264 Gallon (Imp.) 1 Gallon (Imp.) 0,220 Gallon (US) 1 Gallon (US) 1Mile (land mile) +32°F (Fahrenheit) +33,8°F (Fahrenheit) 273,15 Kelvin 274,15 KelvinTermTorqueMoment of forcePressureT M püSymbolNewNm (Newton meter)Nm (Newton meter)barkpmkpmatüOld Conversion1 kpm = 9,81 Nm1 kpm = 9,81 Nm1,02 atü = 1,02 kp/cm2=1 bar = 750 torrCommentT (Nm) = F (N) x r (m)M (Nm) = F (N) x r (m)
ServiceRevised 01/10/20123.4.1© Kessler & Co. GmbH & Co.KGAll rights reservedSectionGeneral instructions for correctassembly and disassemblyTightening torque wheel nut with thrust collarDimensionWheel nut with thrust collar–Phosphourus darkened -Wheel nut with thrustcollar–Galvanized -Tightening torqueTightening torqueM22x1,5 650 Nm --
(for clamp fixation)Service Revised 06/03/20123.4.2© Kessler & Co. GmbH & Co.KGAll rights reserved Tihtening torues of wheel nutsSectionWheel nut with clamp DimensionWheel nut with clamp Wheel nut with clamp Tightening torque Tightening torque – Phosphourus darkened - – Galvanized -M18x2 350 Nm--tolerance +50 Nm
ServiceRevised 01/10/20123.4.3© Kessler & Co. GmbH & Co.KGAll rights reservedSectionGeneral instructions for correctassembly and disassemblyTightening torque wheel nut with spring lockDimensionWheel nut spring lock–Phosphourus darkened -Wheel nut with spring lock–Galvanized -Tightening torqueTightening torqueM18x1,5M22x1,5270 Nm450 Nm250 Nm350 Nm
ServiceRevised 01/10/20123.4.4© Kessler & Co. GmbH & Co.KGAll rights reservedSectionGeneral instructions for correctassembly and disassemblyTighteningtorquecollar nutDimensionTightening torqueCollar nut–Phosphourus darkened -–Galvanized -Tightening torqueCollar nutM30x3,5 1700 Nm --
ServiceRevised 01/10/20123.5© Kessler & Co. GmbH & Co.KGAll rights reservedPage1 of 2 General instructions for correctassembly and disassemblyTightening torques for castle nutsand adjusting nutsTightening torques for castle nuts on ball joints for track rods and ramcylindersCone sized1 (mm)2630323845Threadd2 (mm)M 20 x 1,5M 24 x 1,5M 27 x 1,5M 30 x 1,5M 39 x 1,5The tightening torques of the different thread dimensions of the joints are applicable fornuts of quality S6.Torque(Nm)200- 220280- 300290- 320340- 360410- 430
ServiceRevised 01/10/20123.5© Kessler & Co. GmbH & Co.KGAll rights reservedPage2 of 2 General instructions for correctassembly and disassemblyTightening torque of the adjusting nut resp. slotted nut at flanges resp.gearwheels ect.Threadd1 (mm)M 24 x 1,5M 30 x 1,5M 36 x 1,5M 42 x 1,5M 45 x 1,5M 48 x 1,5M 52 x 1,5M 64 x 1,5Torque(Nm)3604505408508508509501050- 1100
Warranty Statement IC&EE - Parts & Service provides a twelve (12)month warranty on new, remanufactured andrepaired units from time of shipment, coveringfailures due to defective IC&EE service parts orworkmanship. This warranty does not have anyrestrictions on hours or mileage. The warrantyincludes coverage for standard labor and partsnecessary for repairs. However, any shippingcosts, any costs for premium labor or expeditedparts delivery will be the responsibility of thecustomer. ICEE Equipment LLC4300 Little YorkHouston, TX 77093ICEE Equipment LLC38009 Butcher Rd.Leetonia, OH 44431parts@ic-ee.comservice@ic-ee.comwww.ic-ee.com(713) 926-1100