Return to flip book view
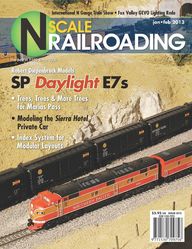
International N Gauge Train Show Fox Valley GEVO Lighting Redo jan feb 2013 Robert Diepenbrock Models SP Daylight E7s Trees Trees More Trees for Marias Pass Modeling the Sierra Hotel Private Car Index System for Modular Layouts
Two eras of Daylight E7A passenger locomotives circa 1948 49 in the rear 1954 55 in the front reflect modifications made to the diesels by the Southern Pacific Modeling Southern Pacific E7s T By Robert Diepenbrock photos by author except as noted he post World War II economic boom filled the passenger trains of America s railroads to capacity with returning veterans who brought an unprecedented wave of prosperity and business activity to the United States With comfortable and reliable commercial aircraft not yet widely available the travel mode of choice for business military and pleasure was by train Railroads wanting to capitalize on increased business flooded the nation s locomotive and car builders with orders for new streamlined passenger trains and modern power to pull them While Southern Pacific had a fleet of sleek GS Class 4 8 4 steam locomotives to power its Daylight passenger trains it was clear the future lay with diesel power In 1937 Electro Motive EMD delivered E2 diesels for the City of San Francisco mutually owned and operated by the 20 n scale railroading Union Pacific Chicago North Western and Southern Pacific so SP was familiar with the operations of a long distance diesel powered streamliner Southern Pacific management was also fully aware of the competition for transcontinental passengers presented by Santa Fe s new diesel powered Super Chief and Union Pacific s City of Los Angeles streamliners Streamlined train sets for SP s Golden State and Sunset Limited were planned in addition to equipment to inaugurate the new San Francisco Portland Shasta Daylight In August 1947 Southern Pacific took delivery of five A B B sets of E7s from EMD Three of the five sets numbers 6000 6002ABC were painted Daylight red orange and black to match the Shasta Daylight train sets The remaining two sets 6003 6004ABC were painted to match the red and silver Golden State However prior to delivery of both the Golden State and Shasta Daylight train sets from Pullman in 1949 SP jan feb 2013 management decided that assigning diesel power painted to match specific trains was too operationally restrictive and standardized all passenger diesels with the Daylight paint scheme so the new E7s were repainted as in Fig 1 The paint was barely dry when it became clear that the E7s had problems with overheating Additional screened vents were added in the upper rear side panels of all the units and in the forward roof panels of the B units to increase circulation Extensions were added to the roof exhaust stacks and safety grabs were added to the nose and over the front windshields The additional vents did not completely solve the overheating issues and in 1950 the front and rear roof vent louvers on all the E7s were removed exposing the roof radiators and structural ribs to further improve air intake Five years later in 1955 SP was still wrestling with cooling issues on the E7s and airfoils were added to the ends of the front and rear roof
Fig 1 Fig 2 Fig 1 E7 6003 repainted from Golden State to Daylight circa 1948 Photo from Southern Pacific Daylight Train 98 99 courtesy of Fred Hill The Whistle Stop Pasadena Calif Allied Model Trains Los Angeles radiator openings to further increase air flow The vertical louvered vent directly behind the cab was also replaced with a screened vent as in Fig 2 In addition to overheating problems the absence of dynamic brakes and lack of pulling power at low speeds caused the SP to move their E7s from mountain routes like the Shasta division to flatter less demanding terrain All the E7s were transferred to Los Angeles and ran out their years on the Sunset and Coast routes powering the Daylight Lark Golden State and Sunset Limited Newer more powerful Daylight painted Alco PAs replaced the E7s on the mountain divisions In the mid to late 1950s the E7s were regularly combined in mixed power lash ups with the newer PAs E8s and E9s so solid sets of E7s were rarely seen In 1958 SP simplified the standard paint scheme from Daylight red orange and black to the simpler less expensive Bloody Nose scheme of SP scarlet and gray Various additional grab irons and roof vents were added until the units were retired in 1968 Chronology of Changes to SP E7s 1947 As Delivered Daylight E7 with solid pilot cover on A unit no hand grabs 1948 1949 Modified Additional vents added in the upper rear side panels on all A and B units Additional roof vents added in forward hatch of B units Ladder grabs added to both sides of A unit cab nose Grabs added above windshields 1950 Roof vent louvers removed 1953 First generation smaller airfoils added to front edge of roof vent openings radios installed Fig 2 E7A 6000 and B followed by an E9A along the California coast with train 99 the northbound Daylight in 1955 Photo from Southern Pacific Daylight Train 98 99 courtesy of Fred Hill The Whistle Stop Pasadena Calif Allied Model Trains Los Angeles 1954 1955 First generation airfoils replaced with larger second generation airfoils added to front and rear edges of roof vent openings Vertical louvered openings behind A unit cabs changed to screening Retractable couplers changed to fixed standard tight lock couplers Coupler hatch covers cut back and permanently closed around coupler shaft Front buffer fixed in extended position Cut levers permanently mounted to cab pilot A unit nose MU electrical connectors installed allowing running elephant style E8 9s delivered Twin single trumpet Leslie horns changed to single Nathan five chime horns on some A units 1958 Paint scheme changed from Daylight red orange and black to Bloody Nose scheme SP scarlet and gray 1959 Dual sealed beam headlights installed on many A units Larger barrel back up lights on rear bulkheads changed to smaller SP type dual lights Single chime air horn installed on rear bulkheads 1960 Full nose ladder grab irons installed on A unit cabs Fuel and water tanks modified Tank side skirts removed 1966 Exhaust stacks changed to F unit type Smoke lifters added 1968 E7s retired Modeling the SP E7s Despite their first generation diesel mechanical drawbacks the long elegant car bodies of the E7s in a matched A B B lash up look great leading a Daylight consist I wanted to have such a set leading my Kato Morning Daylight I decided to model these units in two versions representing early 1948 1949 and modified 1954 1955 eras The early lash up would be A B B units while the 1954 1955 set would be an A and B unit E7 combined with an E9A or PA as run by the SP While my models represent 19481949 and 1954 1955 Southern Pacific continued to make modifications to their E7s until they retired them in 1968 As a result in their later years no two E7s looked exactly alike The best guide to specific details is to acquire a picture of the unit in the year you wish to model Accurate prototype modeling always starts with research The best sources for prototype data and photos are Southern Pacific Diesels Volume 3 by Joseph A Strapac the summer 2004 issue of SP Trainline and Richard K Wright s bible Southern Pacific Daylight Train 98 99 N Scale E7s Two manufacturers offer an N scale E7 Precision Craft and Life Like The one major draw back to the Life Like E7 is their smaller FT type A unit cab number boards While the E7s of several eastern roads such as the Pennsylvania and Chicago North Western had these number boards SP E7s featured the larger F7 type cab number boards as accurately modeled on the Precision Craft E7s You can modify the number boards on the Life Like E7As but the process requires advanced modeling and painting skills For this reason I chose the Precision Craft Daylight units as there is only minor repainting required Precision Craft includes a clip in insert that accurately represents the closed jan feb 2013 n scale railroading 21
Tools Optivisor X acto knife with 11 blades Pin vise and 79 80 1 16 drill bits Tweezers Scissors Small jewelers screwdrivers flat bladed and Phillips Modeler s and jewelers files Nail files and emery boards Various fine grits of sand and garnet paper Detail paint brushes Airbrush of your choice and air compressor or airbrush propellant of your choice Parts Supplies Precision Craft E7 A and B as many as desired Evergreen styrene strips 30 x 30 Evergreen styrene strips 10 x 10 Evergreen styrene sheet 015 Thick Evergreen 100 styrene rod K S 250 005 shim brass sheet Precision Scale fine brass screen Gold Medal Models 160 7 Windshield Wipers and Lifting Rings for Diesels Gold Medal Models 160 56 Grab Irons Gold Medal Models 160 66 Kato Diesel Locomotive Hand Grabs BLMA 99 E F Unit Ultimate Detail Set Cocktail straw Micro Trains N or Z scale coupler Plastruct Plastic Weld Liquid Cement Testors Model Cement Cyanoacrylate glue thin and medium viscosity Caboose or Signal Red and Daylight Orange paints Black and Weathered Black scale model paints Microscale N 60 33 Southern Pacific Steam decals Microscale N 60 247 4 Santa Fe Zebra Stripes decals Microscale HO 87 699 Santa Fe F Units Cat Whiskers Scheme 1940 52 decals Microscale HO 87 1057 Southern Pacific Shasta Daylight decals Solvaset decal setting solution Fig 3 hatch cover on the A unit front coupler opening forming a solid pilot which was on the as delivered Daylight E7As Modifying SP E7s circa 1948 1949 Please refer to Figures 3 and 4 for lists of tools parts and supplies as well as the modifications described below Using a small jewelers Phillips head screwdriver remove the front coupler on the A unit and set aside Remove the body from the chassis I chose to model this version with the front pilot coupler hatch closed which gives the A unit a very streamlined look so I clipped in the solid pilot cover supplied by Precision Craft to the A unit as shown in Figures 1 and 4 B Unit Front Roof Hatch Vent Openings Using a pin vise and 1 16 drill bit drill 22 n scale railroading holes in the front hatch vent of the B unit as shown in Figure 4 Use an X acto knife with a sharp 11 blade to cut from hole to hole and remove the inner section of the roof hatch Carefully cut and shave the edges and square up the corners creating a rectangular opening in the B unit front hatch Change blades as often as needed as they become dull Smooth finish and square the edges using modeler s files and emery boards Cut pieces of 015 styrene sheet to fit and glue into the underside of the roof with Plastruct Plastic Weld Liquid Cement creating a bottom to the vent holes cut in the roof Cut a piece of 015 styrene spacer to fit into the new B unit hatch hole glue to the bottom of the vent hole Hand paint the bottom of the vent jan feb 2013 holes flat black For the roof vents screening we actually use HO and O scale fine window screening as it scales down well for N scale This is something I learned early on in my modeling Don t limit yourself to detail items in your scale Parts from other scales such as HO and even O can work in certain situations Using sharp scissors cut the Precision Scale fine screening slightly larger than the size of the B unit front hatch vent opening Trim and fit to size using an X acto knife and a new sharp 11 blade Glue the screening into the bottoms of the roof vent openings in the B unit front hatch using thin viscosity cyanoacrylate glue as shown in Figure 10 Grab Irons Using a pin vise and 80 drill bit drill mounting holes and add the two ladder
Modifications to SP E7s circa 1948 1949 Screened vents added to upper rear side panels on all units using decals Screened vents added to front roof hatches of B units Screened intake vents in upper side panels painted flat black on all units Grab irons windshield wipers added to A unit cab HO scale gray stripe decals added to inside of front rear side windows Coupler cover added to A unit pilot Fig 4 grabs on the A unit cab nose the two hand grabs over the cab windows the two hand grabs on the front pilot anti climbers and the windshield wipers using Gold Medal Models 160 7 Windshield Wipers and Lifting Rings for Diesels 160 56 Grab Irons and 160 66 Kato Diesel Locomotive Hand Grabs Secure with cyanoacrylate glue Hand paint the ladder and hand grabs Caboose or Signal Red as shown in the opening photo and Fig 4 Back Up Lights Southern Pacific E7A and B units had barrel type back up lights mounted on the upper left fireman s rear bulkhead as shown in Figure 5 These can be modeled using a cocktail straw yeah that s right a cocktail straw Sometimes low tech is better The cocktail straws you re looking for are black and fit snugly around an Evergreen 100 styrene rod So take your rod and get down to your local bar and have a drink Fit the styrene rod into the straw to confirm its correct diameter save the straw Using an X acto knife with a sharp 11 blade cut a 1 16 piece off the end of the straw When you make this cut it will squash the straw so insert the Evergreen 100 styrene rod in the straw piece to round it out Cut a piece off the end of the Evergreen 100 styrene rod that is slightly thinner than the 1 16 straw piece Insert this rod piece into the straw piece This will leave a collar on the straw as on the real barrel type back up light It will also make a solid back to barrel light making it rigid and easy to glue to the rear bulkhead as shown in Figure 6 Mount the light to the rear bulkheads using thin viscosity cyanoacrylate glue Hand paint the barrel light housing Caboose or Signal Red Hand paint the lens area bright silver or apply a jan feb 2013 n scale railroading 23
Fig 5 Fig 6 Fig 5 This view of the rear of an SP E7 shows the location of the back up light Photo from Southern Pacific Daylight Train 98 99 used with permission To the right is the finished model Fig 6 Cocktail straw pieces cut with 100 styrene rod inserted Fig 7 Fig 7 An A B B set of E7s leads southbound 98 the 1948 49 Daylight across Gaviota Trestle on the author s layout 24 n scale railroading jan feb 2013
g 7 suitably sized MV Products Lens using thin viscosity cyanoacrylate glue as shown in Figure 5 Upper Rear Panel Side Vents I chose to do these vent openings with decals as in N scale the screen mesh in these vents is so fine the detail disappears The effect achieved with decals is quite satisfactory as shown in Figures 4 5 and 7 I use the black cab number background rectangles from the Microscale N 60 2474 Santa Fe Zebra Stripes decal sheet Apply and allow to dry thoroughly Apply Solvaset to set decals Next apply red stripes from the Microscale HO 87 699 Santa Fe F Units Cat Whiskers Scheme 1940 52 decal sheet over the black rectangles to make the two vertical frame members as shown above in Figure 5 Apply Solvaset to set decals Interior Structural Ribs A unique feature of E7s was the diagonal interior structural I Beam ribs that bisected the front and rear side windows and were visible Because the Precision Craft locomotive chassis is flush with the interior walls the is no room to apply anything structural so again I use decals Using Microscale HO Scale 87 1057 Southern Pacific Shasta Daylight cut the gray stripes to size and apply to the inside of the windows once dry apply Solvaset As with the upper rear side vents the effect is very realistic as shown in Figures 4 7 and 14 Modifying SP E7s circa 1954 1955 When modeling the 1954 1955 era E7s include all the modifications made to the 1948 1949 versions with the exception of the solid pilot I recommend that you perform all the cuts and major modifications to the bodies prior to installing any detailing For example cutting the roof vent openings mentioned below should be done before installing the back up lights mentioned previously to prevent damage or knocking off any details Use a small jewelers Phillips head screwdriver remove the front coupler on the A unit and set aside Remove the body from the chassis A Unit Cab Pilot Coupler Buffer in Extended Position Southern Pacific E7As were delivered with retractable front pilot couplers buffers and cut levers with hatches that folded over them to create solid streamlined pilot In 1954 this complicated mechanism was replaced with a fixed standard tight lock coupler The hinged doors were cut back and permanently closed around the coupler shaft the buffer was fixed in the extended position and the cut levers were permanently mounted on the pilot Using a flat modeler s file flatten the front of the coupler buffer Using an Evergreen styrene strip cut to size an extended buffer piece to match the width of the buffer Glue to the front of the flattened buffer using Testors Model Master liquid cement Hand paint the extended buffer flat black as shown in the opening photo and Figure 8 We ll apply the remaining pilot coupler details later during final assembly and detailing Modifications to SP E7s circa 1954 1955 Screened vents added to front roof hatches of B units Roof vents cut out screen added structural ribs added front rear airfoils added on all units Grab irons windshield wipers added to A unit cab Extended coupler buffer coupler cut levers added to A unit pilot Screened vents added to upper rear side panels on all units using decals Screened intake vents in upper side panels painted flat black on all units HO scale gray stripe decals added to inside of front rear side windows Screened intakes added to vent behind cab Fig 8 jan feb 2013 n scale railroading 25
Roof Vent Openings Roof Vent cutouts with styrene bottoms glued in Fig 9 Roof Vent Openings This modification to the roof vents really changes the look of the units because it s so visible from our bird s eye view as we watch our trains run Using a pin vise and 1 16 drill bit drill holes along the inner sides and corners of the molded on vent frames of all four roof vents on all units Use the horizontal vent lines on the four main roof vents as a drilling guide Be careful not to start the holes too close to the molded on roof vent frame to avoid marring the cast on detail Using an X acto knife and a new sharp 11 blade cut from hole to hole and remove the inner sections of the roof vents Carefully cut and shave the edges and square up the corners creating a rectangular opening with the cast on molded roof vent frames as a frame Change blades as often as needed as they become dull Smooth finish and square the edges using modeler s files and emery boards Cut pieces of 015 styrene sheet to fit and glue into the underside of the roof with Plastruct Plastic Weld liquid cement creating a bottom to the vent holes cut in the roof as shown in Figure 9 Hand paint the bottom of the vent holes flat black Roof Vent Radiator Screening Using a sharp scissors cut Precision Scale fine screening slightly larger than the size of the roof vent openings Trim and fit to size using an X acto knife and a new sharp 11 blade Glue the screening into the bottoms of the roof vent openings using thin viscosity cyanoacrylate glue as shown in Fig 10 Screened Side Vent Behind the A Unit Cab Using a detail brush hand paint the vertical louvered openings behind the A unit cab flat black Using sharp scissors cut Precision Scale fine screening slightly larger than the size louvered openings Trim and fit to size using an X acto knife and a new sharp 11 blade Roof Vent Cutouts Roof Vent cutouts with screening above and structural ribs below Fig 10 26 n scale railroading jan feb 2013 Cut two small strips of Evergreen styrene strips 10 x 10 to size and glue them along the gray trim line separating the red and orange colors Cut the screening into two pieces to fit above and below the Evergreen styrene strips Hand paint the upper screen Caboose or Signal Red and the lower screen Daylight Orange Apply a thin layer of thin viscosity cyanoacrylate glue to the louvered openings Place the screens into the openings as shown in Figure 13 Roof Vent Airfoils Because of the size of these parts this process can be exacting You may have a few rejects but once you ve done a few you ll get the hang of it Just follow the instructions in Figure 11 Note in Figure 11 that the square end of the airfoil is deeper than the concave end This will allow us to glue the square end into the roof vent opening for a stronger bond The concave end will conform to the curve of the roof Using sharp scissors cut a strip of K S 250 005 brass shim sheet material sized to the width of the ends of the roof openings Trim and fit using an X acto knife and a new sharp 11 blade as shown in Figure 11 Step 1 Using sharp scissors make a concave cut in the end of the brass strip as shown in Figure 11 Step 1 Mark a line across the brass strip and using a dull yes DULL we re using a dull blade to avoid cutting through the thin brass shim material 11 blade press and score along the line as shown in Figure 11 Step 2 Align the scored line along a sharp straight edge and fold down 90 degrees
Fig 11 Align the scored line along the edge of a dull 11 blade mounted in an X acto knife and continue to fold completely over as shown in Figure 11 Step 3 Mark a line across the brass strip and using a sharp 11 blade press cut along the line per Fig 11 Step 4 Align the folded strip along the edge of the dull 11 blade mounted in an X acto knife and unfold slightly to a 30 degree angle as shown in Figure 11 Step 5 Repeat as needed to make airfoils for both ends of each of the roof openings eight airfoils per unit Glue the airfoils to the ends of each roof vent using thin viscosity cyanoacrylate glue Squeeze out some glue onto a square of aluminum foil and dip the end of a toothpick in the glue then apply to the roof Run a thin bead of glue along the inside front and or rear of the roof vent frame opening and along the roof Take care when applying as we don t want to have excess glue on the roof Place the airfoil with the square end against the inside front or rear of the roof vent opening s and the concave end on the roof as shown in Figure 12 Set aside to dry Modeling Tip This is one of those well that s obvious everybody knows that things but I ve never seen it mentioned in a modeling article I never apply any glue or adhesive directly from the tube or bottle onto my models There s too little control and too much chance of getting glue where you don t want it and marring a model you spent hours on I always apply the glue or adhesive to a separate medium like a small square of aluminum foil then dip a toothpick or brush in the glue and apply it to the model this allows precise control Another Modeling Tip Once you install these airfoils on the roof take care when handling the body to avoid knocking off these details Roof Vent Structural Ribs While the prototype structural roof ribs were I beams there are none available small enough for N Scale No matter use Evergreen Styrene Strips When painted flat black you can t see the difference at this scale Using Evergreen styrene strips 30 x30 and an X acto knife with a new sharp 11 blade cut to size three structural ribs per roof vent opening 12 per unit Using the shaft of the X acto knife slightly bend the ribs to match the curve of the roof Trim the ends to fit and secure with thin viscosity cyanoacrylate glue Start with the center rib and work out to establish correct spacing as shown in Fig 12 Painting and Decaling Because the Precision Craft ModelsBroadway Limited Imports E7s are already painted in Daylight colors this process is simple and straightforward Mask and airbrush the roofs on all units flat or Engine Black If desired for contrast so the roof vent structural ribs show up better mask and airbrush the roof vent screened areas on all units Grimy or Weathered Black and hand paint the structural ribs flat black as shown in Figure 8 I chose to do this Hand paint the screened side vent openings on all units flat black as shown in the opening photo and Figures 7 8 and 14 The Precision Craft E7s come with cab number boards numbered for the units to allow the locomotives to be assigned to any numbered train Southern Pacific cab number boards displayed the numbers of Fig 12 Fig 12 Roof vents with screening structural ribs airfoils added Front airfoils painted rear airfoils unpainted jan feb 2013 n scale railroading 27
If you choose to do this paint over the A unit cab number boards with gloss black and apply suitable Microscale number decals of choice I used numbers from Microscale Decal Sheet 60 33 Southern Pacific Steam Set units aside to dry Final Assembly and Detailing Clip the bodies back onto the chassis Reinstall the stock Precision Craft Models N scale A unit front coupler or use a Micro Trains coupler I personally prefer to use MicroTrains Z scale couplers on the front of my locomotives as Fig 13 they are more corFig 13 Front of A unit modified to 1954 1955 showing cab and pilot rect to scale details applied and painted Using BLMA 99 E F Unit the trains they were assigned to not the Ultimate Detail Set remove the cut locomotive number I chose to repaint my lever assembly and install it on the A number boards to reflect this I painted my unit front pilot using thin viscosity 1948 1949 A unit No 98 for the southbound cyanoacrylate glue making sure the Coast Daylight and my 1954 1955 A unit 99 coupler has clearance to swing Hand for the northbound version paint the ladder and hand grabs Caboose or Signal Red as shown in Figure 13 A Word on Detailing Without companies like Gold Medal Models and BLMA projects like this would be considerably more difficult and time consuming I ve spent many a night hand bending my own grab irons and cut levers Thanks to these dedicated hobbyists turned business people we have a much easier way to super detail and create prototypically correct brass quality N scale models Modeling Philosophy The reason most of us get into this hobby is to recreate a railroad experience from our youth Now the question is how accurate do I want that memory to be Some of us are content to buy a model drop it on the tracks and run it stock Others are rivet counters and superdetail our models so they re 100 percent accurate to the prototype I still enjoy detailing my models to more closely represent the real thing but as I ve aged and mellowed I m not as fanatical about it I think some of it is my eyesight isn t what it used to be so some of these fine details are less visible and therefore less important I ve also learned that the unspoken law of modeling states that as soon as you complete that 100 percent accurate to the prototype model you come across a picture that shows you missed something What s great about this hobby is that all of us have the choice to apply as little or as Fig 14 Fig 14 Profile views of the E7 A B units modified to 1954 1955 shows roof vents cab side screening decaled upper rear side panel vents and interior window supports 28 n scale railroading jan feb 2013
It s 1955 and an A B set of E7s followed by an E9A lead southbound train 99 the Daylight on the author s layout much detail as we wish to our models An example of this is that both the Precision Craft A and B units have Southern Pacific painted on the lower front panels as shown in Figure 14 In reality when SP took delivery of their E7s Southern Pacific was painted on the upper panels of both the A and B units When the E7s were repainted in 1949 the Southern Pacific name was moved to the lower front panels the E7 A units and the B unit lower panels were painted solid red with no name just the unit number on the lower rear panel So if I want my B units to be 100 percent accurate I need to mask and paint these B unit front panels red But ya know this is my railroad and I kinda like the look of the Southern Pacific on the flanks of my B units and for my money the real SP shoulda painted their name on their B units Maybe someday they ll go into the paint shop but for now they re just fine as delivered A Word on Precision Craft ModelsBroadway Limited Imports Precision Craft Models Broadway Limited Imports manufactures brass quality H0 and N scale locomotives Their products reflect a commitment to quality mechanisms and attention to detail including raised handrails hand grabs and working diaphragms Like the brass import companies of the 1980s Precision Craft Models Broadway Limited Imports runs are limited and based on advance reservations While the E7s are sold out and are not currently at retail if you shop around on places like eBay you can pick these up at excellent prices The DCC sound equipped units are more expensive than the non DCC but considering the cost and time involved with installing DCC and sound they re a bargain Based on their successful H0 business the E7s were Precision Craft Models Broadway Limited Imports first effort in N scale They are currently taking reservations for N scale E8 9s and PA PBs If you want to see these manufactured order them from your hobby dealer Mixing Precision Craft Models E7s with Kato E9s and PAs As mentioned earlier from the midto late 1950s Southern Pacific regularly combined their E7A and B units with later model E8 9As and PA PBs in mixed power lash ups as shown in the above photo The Precision Craft units are geared very close to the Kato E9s and PA PBs so a mixed lash up can be achieved even with non DCC Well by now the crew is done with final touches Let s run these E7s out of the paint shop and down to the coach yard to couple up to our Kato Morning Daylight for a run up the coast ENJOY w jan feb 2013 n scale railroading 29